Bill Lugg
Introduction
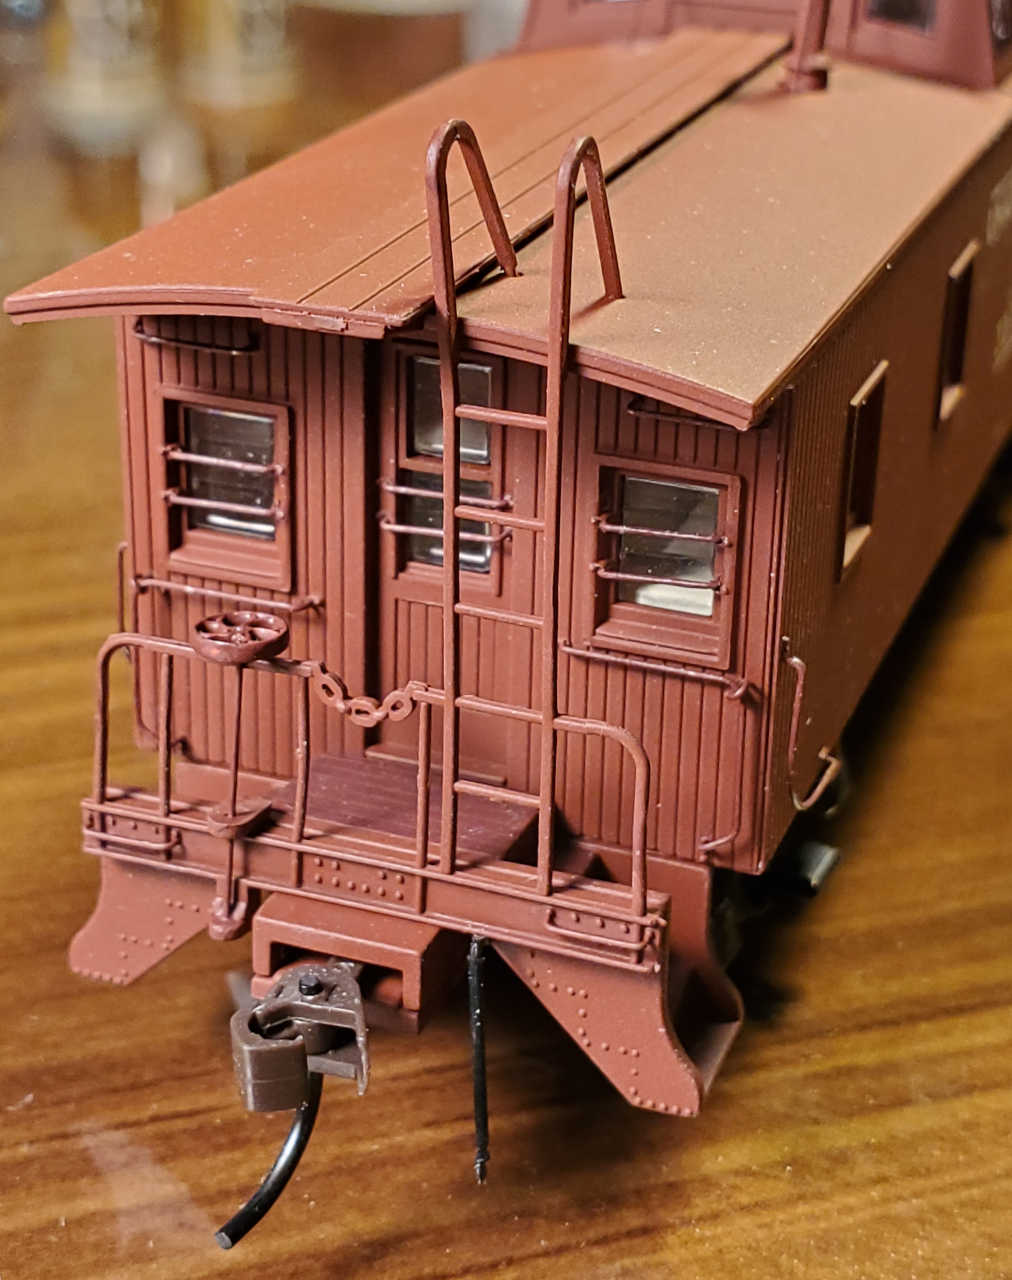
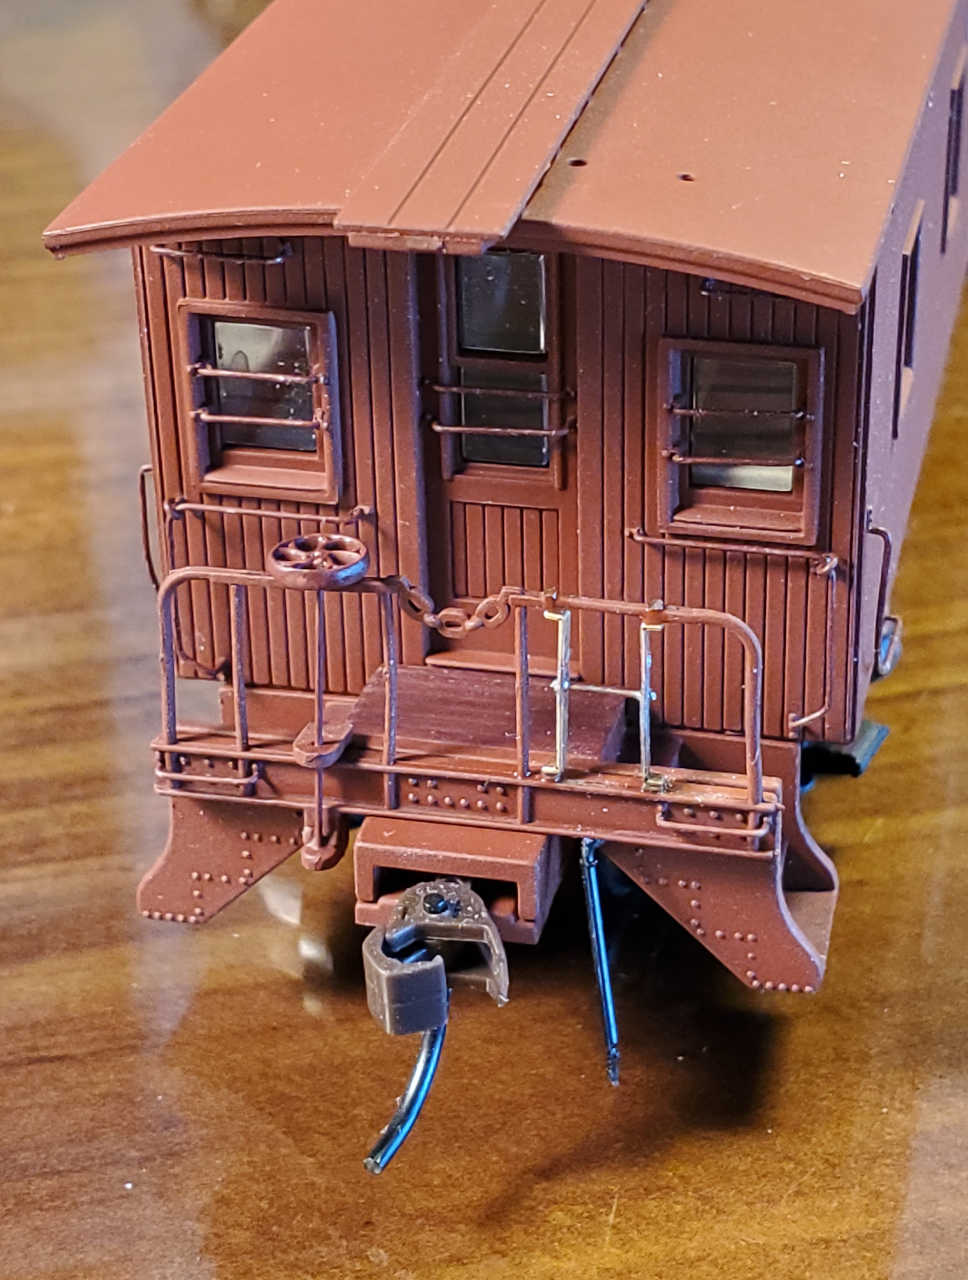
The cast ladders that come as a part of the end rail castings in the Walthers UP CA-1 caboose are quite oversized and don’t match the prototype in that they are missing the characteristic “joggle” where they come off the handrail. I’ve designed a photo etched set of ladders that addresses these issues. What follows are some thoughts and instructions for assembly and installation of the photo etched ladders.
I should mention a couple of caveats before we begin. First, while the etching process did a good job, it failed to etch through the holes for the ladder rungs. Those will need to be cleared with a #80 drill. You will observe a dimple on both sides of the etching where the holes are supposed to be. I found taking a few turns of the drill on each side with very little pressure was sufficient to open the hole and caused the least distortion to the parts. Second, I managed to confuse the “I” and the “O” designations for the Inside stiles and the Outside stiles. The “I” stiles are actually the outside stiles and the “O” stiles are actually the inside stiles.

You’ll notice the half etch at the bend locations. All the bends should be made toward the bend reliefs. I used an Etch Mate tool to bend some of the parts, but found a good pair of pliers will work just as well. In fact, for the roof edge tabs and the roof feet on the upper ladder stiles pliers are the order of the day. With all that said, let’s get started.
Preparing the Assembly Jig
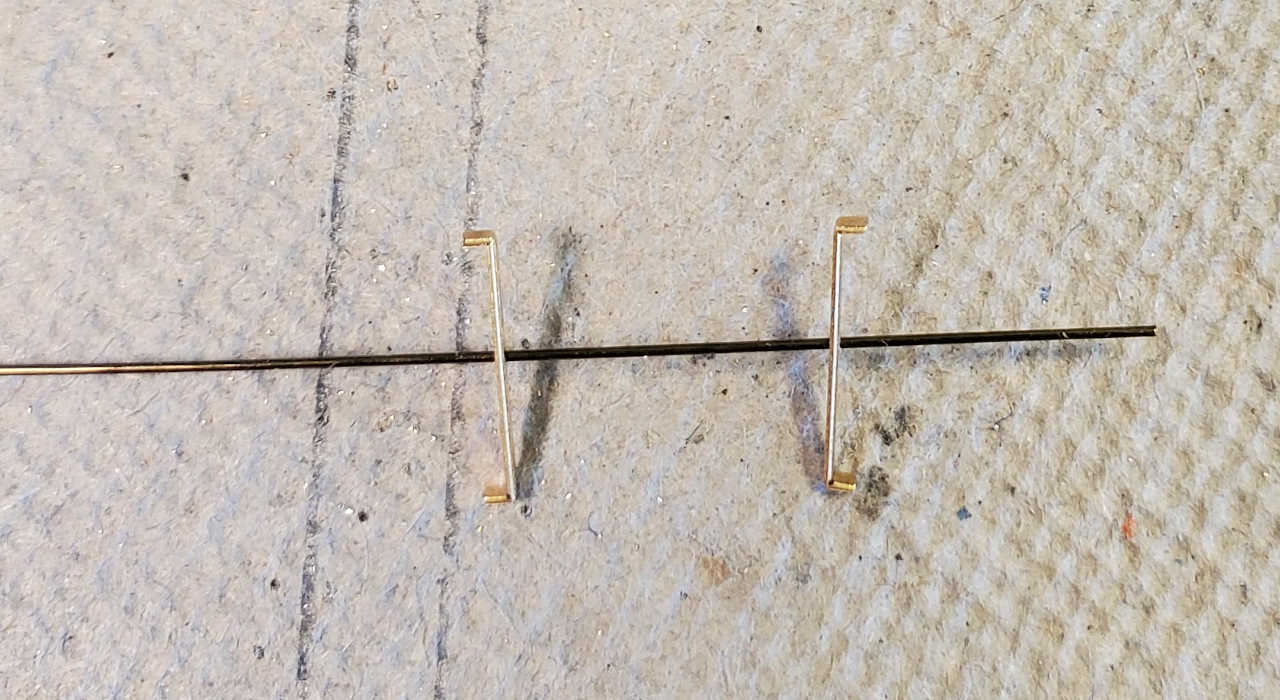
To begin, you need an assembly fixture you can use to lay out two lines to align the stiles on and use some pins to secure them in place while you solder the rungs. I used a scrap piece of Homasote, but a piece of soft wood would work as well. draw two lines 14 scale inches (0.161″) apart on it and strike a line perpendicular to them to use as a point of alignment for the feet of the ladders. I found about eight pins were enough to secure a single set of stiles in place for soldering.

Assembling the Lower Ladders
This is the time to drill out all the rung holes in the stiles if you haven’t already. Next separate one of the lower ladder pieces from the fret and carefully clean up the tags that might be left on the ends of the part. The with pliers or your etch bending tool place the stile with the half etch just showing and bend to about 45 degrees. I made the rest of the bend with my fingernail being careful not to break off the tab. do the same with the other end. Repeat the process with the next lower stile.

Now, note the rung hole is not in the center of the stiles. make sure you get both oriented the same way. Cut about 1″ of 0.012″ wire and thread through the two stiles. place one stile on the left or right line with it’s foot on the perpendicular line. place a pin on the inside of the bend at the top and the bottom and a third near the middle on the other side of the stile. Align the other stile on the other line and pin it the same way.

Time to solder – I found 63/37 Sn/Pb paste solder worked best for this exercise. Unfortunately, I didn’t figure it out until I did the last ladder. Probably, lead free solder paste would work as well. I put a very small dab at each joint with a micro brush and applied heat briefly from my iron, which was set at 630 degrees. I found I had to use solder wick to remove some of the excess solder. The photos show the results. While using wire solder, I found using 0.025″ solder was optimal as larger solder put too much in the joint too fast.


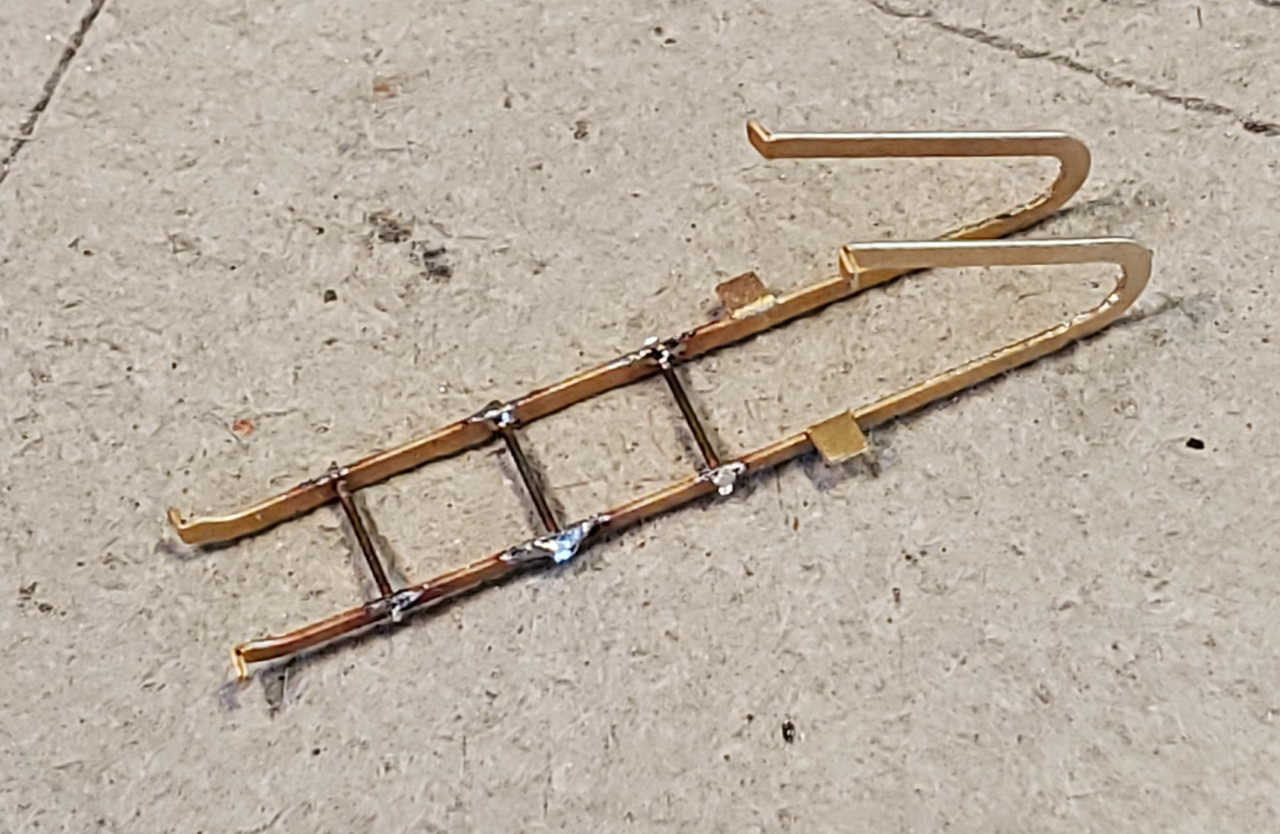
Assembling the Upper Ladders
Assembling the upper ladders is similar to assembling the lower ladders. Remove an “I” stile and an “O” stile from the fret remembering that they are reversed. The feet at the bottom can be bent in an Etch Mate, but the others must be bent with pliers. The roof tabs require a little extra care to ensure the stiles don’t get bent in the process. Once compete, place the stiles back to back against each other with the joggles aligned and thread the three 1″ long pieces of 0.012″ wire through the rung holes.

Next, pin one of the stiles on the corresponding line, anchoring it at the registration line. I used the roof tab as the other anchor and placed two pins on the other side of the stile to hold it in place. Pin the other stile in the same manor and you’re ready to solder.

As stated earlier I found paste solder works better than wire. See the photo in the previous section showing how I applied the paste to one of these ladders. A little heat and a little solder wick to clean things up…and a little careful filing to finish the job and the result is below (before clean-up and after). I did find I had to tweak the upper, arched part of the ladders a bit to get them straight. After soldering they wanted to splay out a little bit.


I decided to assemble all the ladders before attacking the caboose. Be sure to carefully clean any flux off the ladders before proceeding.
Modifying the Caboose
With the ladders constructed, it’s time to perform some surgery on the caboose. These instructions assume the caboose is already built, although little changes if it isn’t. A note regarding the tools and adhesives I used: I have a pair of Klein clippers I found quite effective at separating the ladders from the caboose; they are shown in the photos below. I used thick CA to fasten the new ladders to the caboose as I found this provided the most rigidity for the handrails and ladders.


Before removing the ladders, I cemented the ladder pins into the roof so I could use them to plug the holes. After the cement dried, I clipped the upper ladder at the roof and the top of the end handrail. For the first end, I also clipped out the lower ladder, but I found the handrail to be extremely flimsy during the clean-up process, so I don’t recommend this.


Before removing the lower ladder, clean up the handrail with a VERY sharp Xacto knive and/or a fine cut file (I used both) while supporting the handrail with tweezers or pliers – it is pretty fragile. Carefully trim the pin plugs smooth at the roof surface with the Xacto knife too.
Next remove the lower ladder. As it turns out, the lower ladder etching when bent is about 0.005″ too short, so you need to leave a little stub of the old ladder on the end beam. I cut them flush at the handrail and long at the end beam. Then, using the same technique as above clean up the handrail. Finally, using a fine cut file, adjust the height of the stubs until the new lower ladder fits snugly between the handrail and the stub ends.

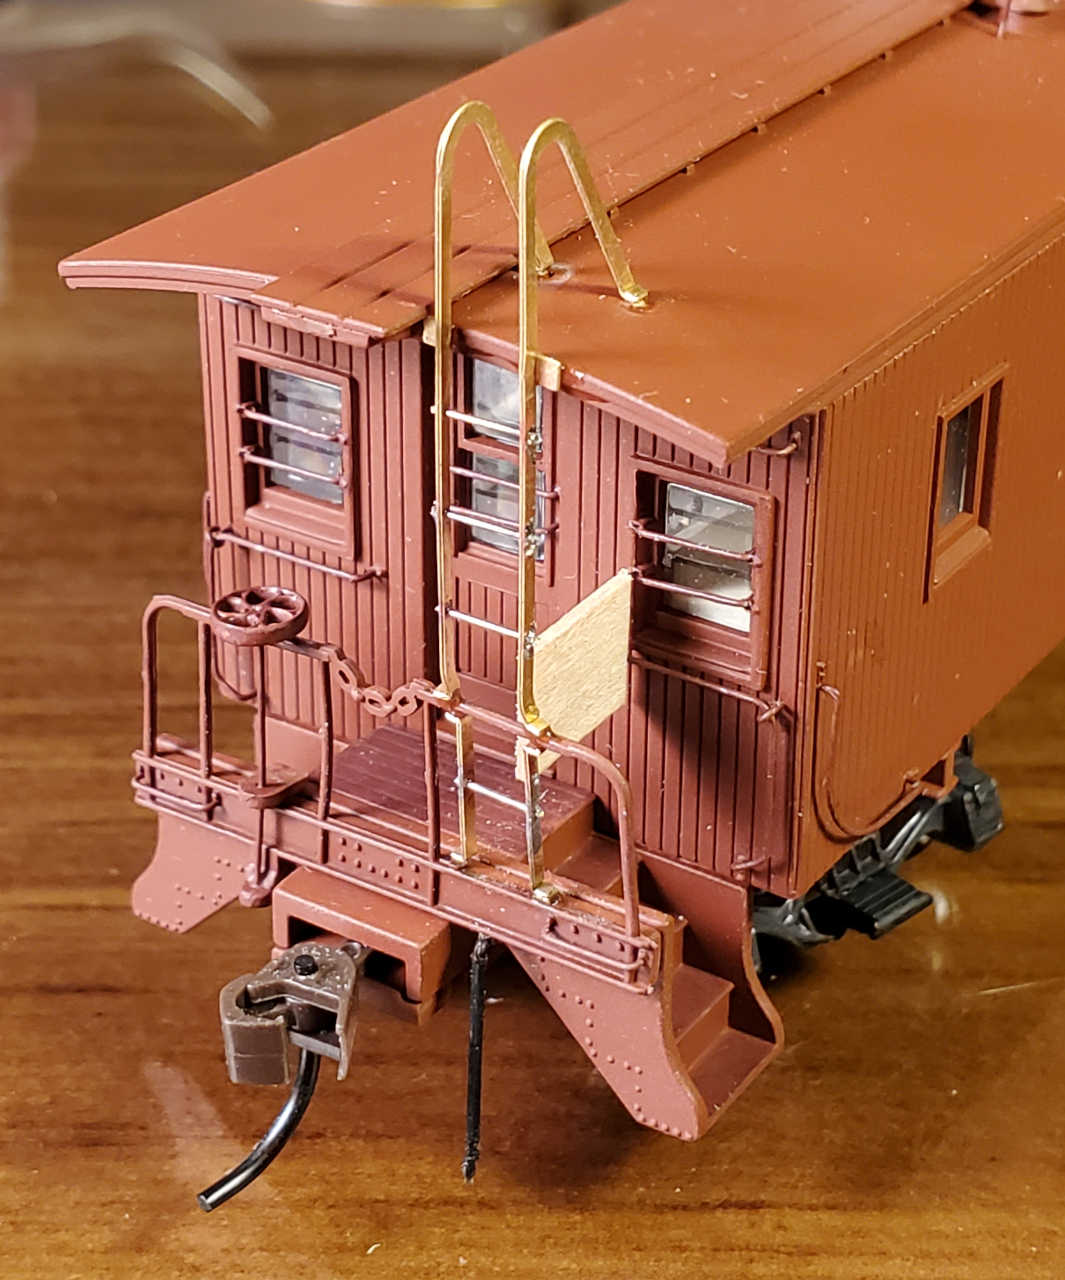
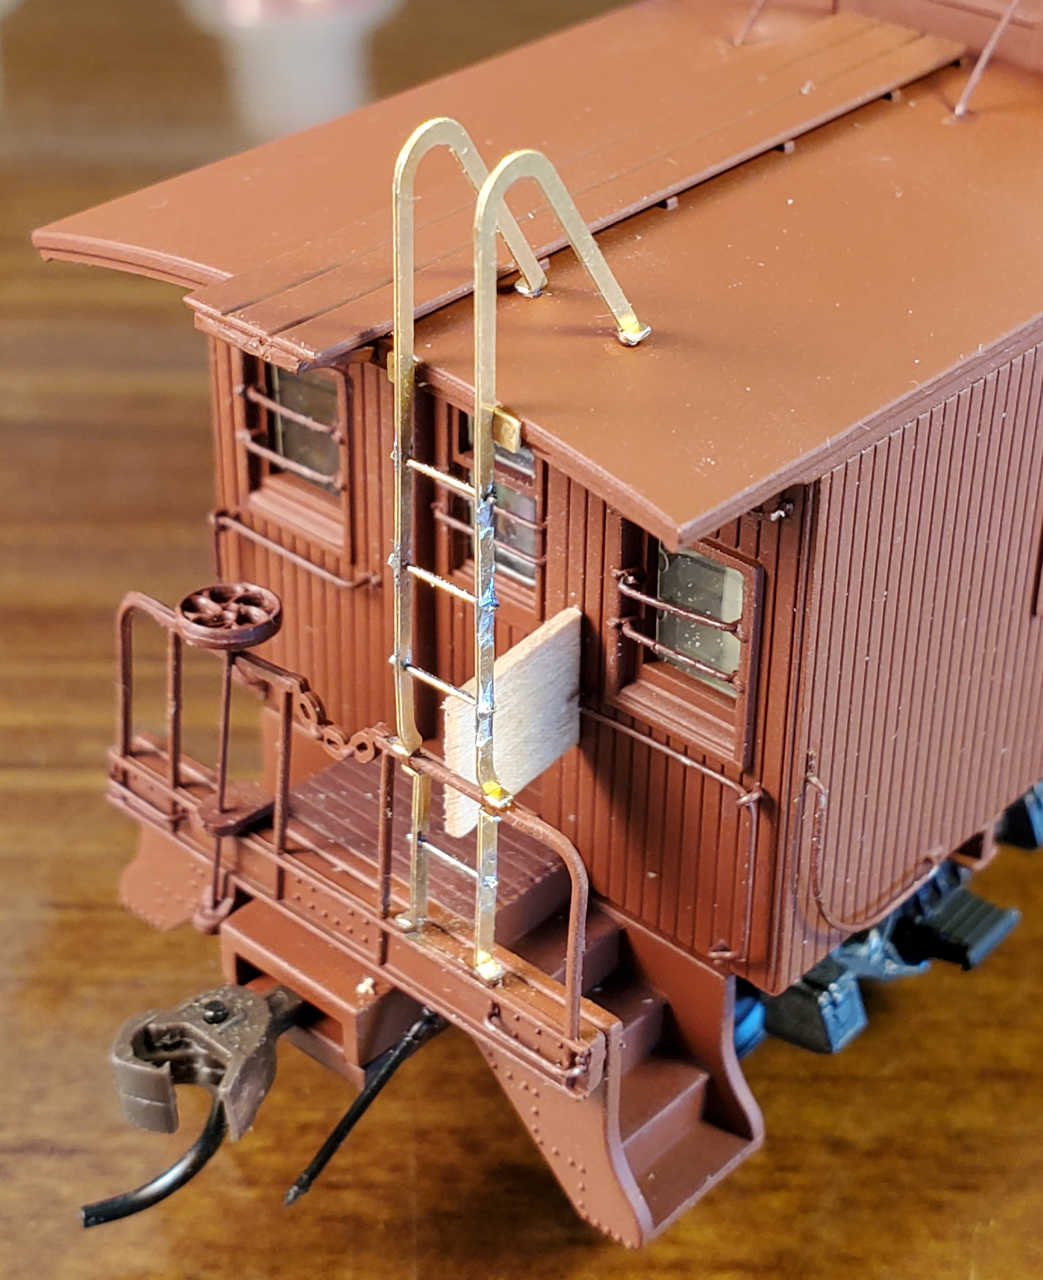
Before installing the ladders, I noticed on my caboose, the handrails leaned in toward the end of the car a bit. This was causing an alignment issue for the upper ladder. So I cut a piece of stripwood long enough to wedge between the end of the car and the handrail between the ladder stiles. I placed this prior to installing any ladders.
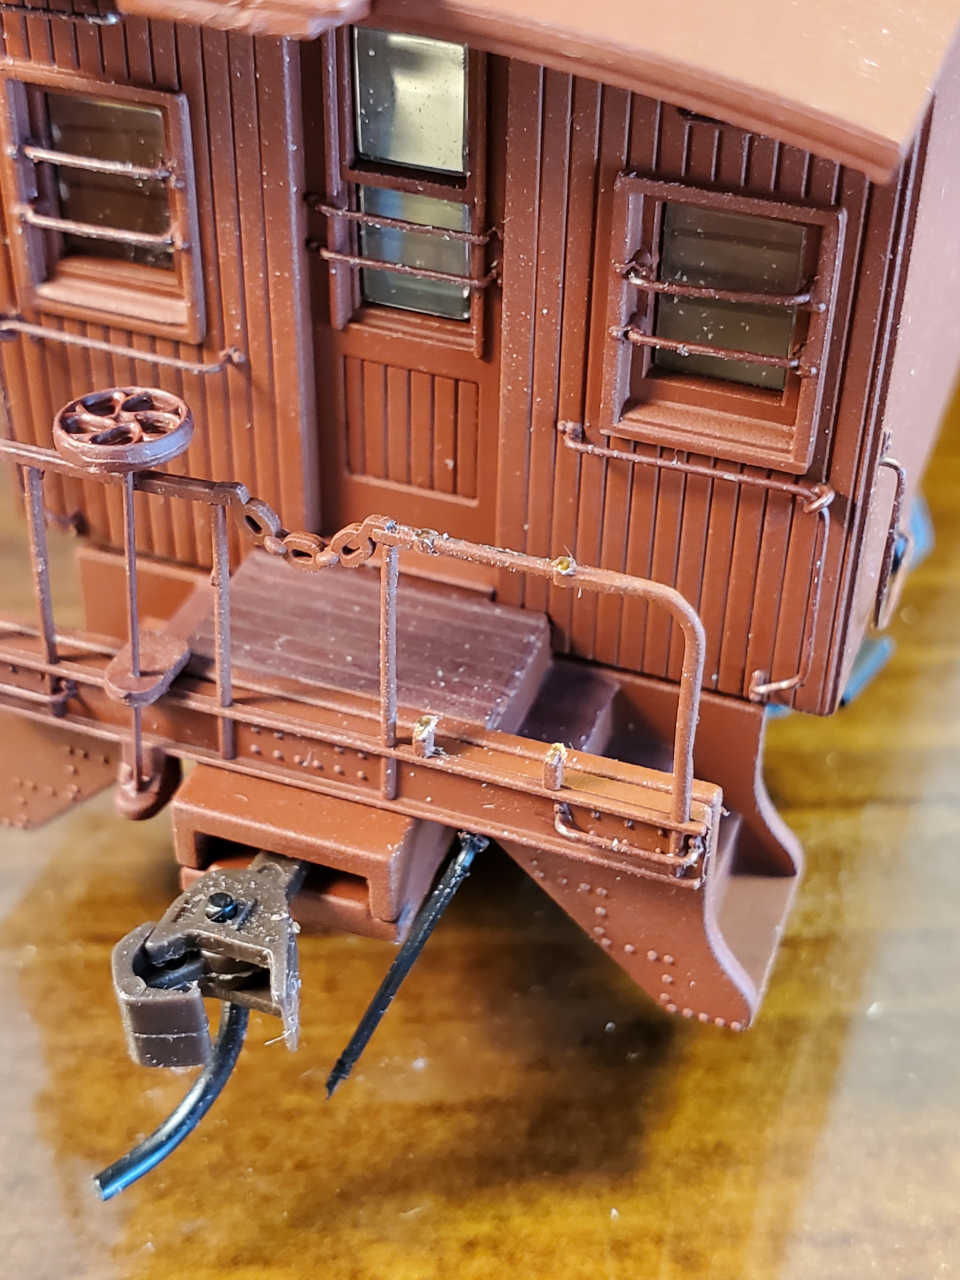
It is now time to install the lower ladders. After a test fit to ensure all is well and to figure out how to best grip the ladder for installation, apply cement to the four feet and carefully place it. I found putting it against the handrail first and then slipping it onto the stubs on the end beam worked best for me.

Next, install the upper ladder by test fitting first. Make sure the roof tabs align with the roof properly, and the roof feet lay over the pin plugs. When you’re satisfied with the fit apply cement to all six tabs and install the ladder. I found setting the ladder on the handrail and moving it into position against the roof edge seemed to do the trick. I also braced the caboose against the assembly jig so it wouldn’t roll away from me while I was fitting the ladders into place.

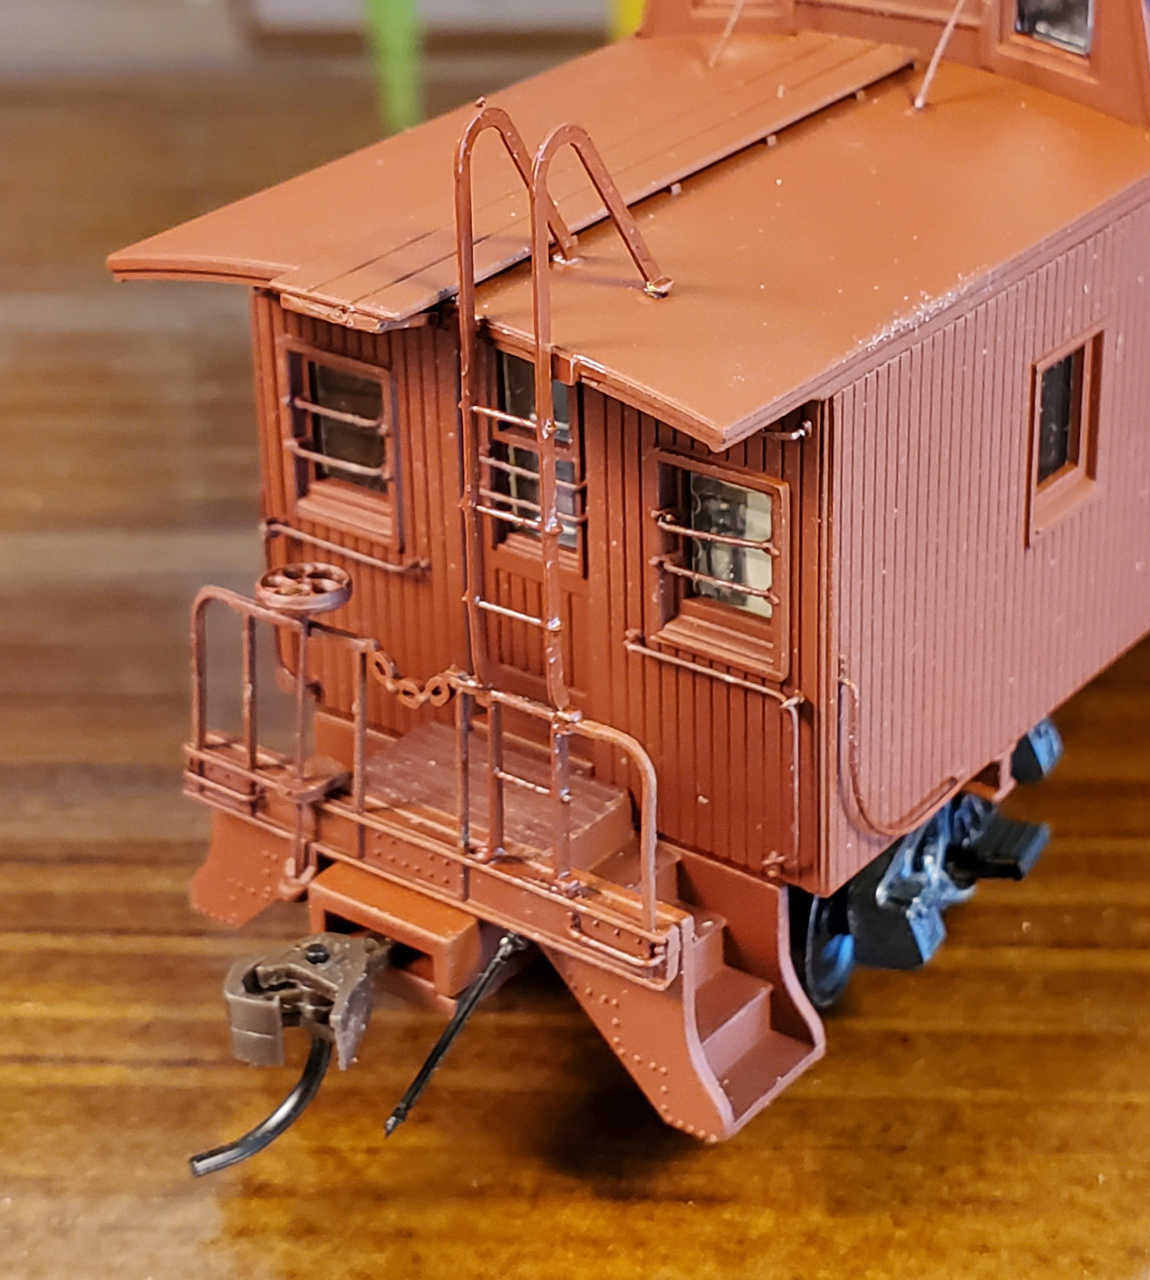
Painting the Ladders
Now that the ladders are installed it’s time to apply some color. I had previously painted the grab irons and brake wheel/brake staff with a very old bottle of Floquil Box Car Red that proved to be a pretty good match, but I found the paint was pretty well shot. In the meantime I had acquired Badger Modelflex 16-14 Light Tuscan Oxide and Badger Modelflex 16-15 Maroon Tuscan Oxide. The Model Railroad Hobbyist’s Guide to Acrylic Painting (requires login) recommends a mix of 2 parts of the latter with 1 part of the former as a good match for Box Car Red. I put some the Maroon Tuscan Oxide in my mixing palette and noted it looked remarkably close to the caboose color, so I tried a little on one of the grab irons that had paint coming off. Sure enough, it is almost a perfect match.
So, I recommend Badger Modelflex 16-15 Maroon Tuscan Oxide to paint the ladders. I began on the inside edges of the stiles and then moved to the sides and finally the outer edges and the rungs. The results are shown in the photos below.

Hopefully, I’ve covered everything sufficiently. If you have any questions, feel free to email me.
SDG